前言 #
更新一下自己的博客装修,这次更改的地方不多,把整个网站改得更典雅了,稍微有点手账本的感觉。这次装修的灵感主要来自Typography主题和Footprints on the Moon。
修改背景 #
我个人很喜欢格纹,也觉得格纹与手账感特别特别搭,于是我把网站的所有页面背景都换成了淡淡的格纹,效果如图:

代码如下:
body {
  background-image:
    linear-gradient(0deg, rgba(0, 0, 0, 0.04) 1px, transparent 1px),
    linear-gradient(90deg, rgba(0, 0, 0, 0.04) 1px, transparent 1px);
  background-size: 8px 8px;
}
魔改首页 #
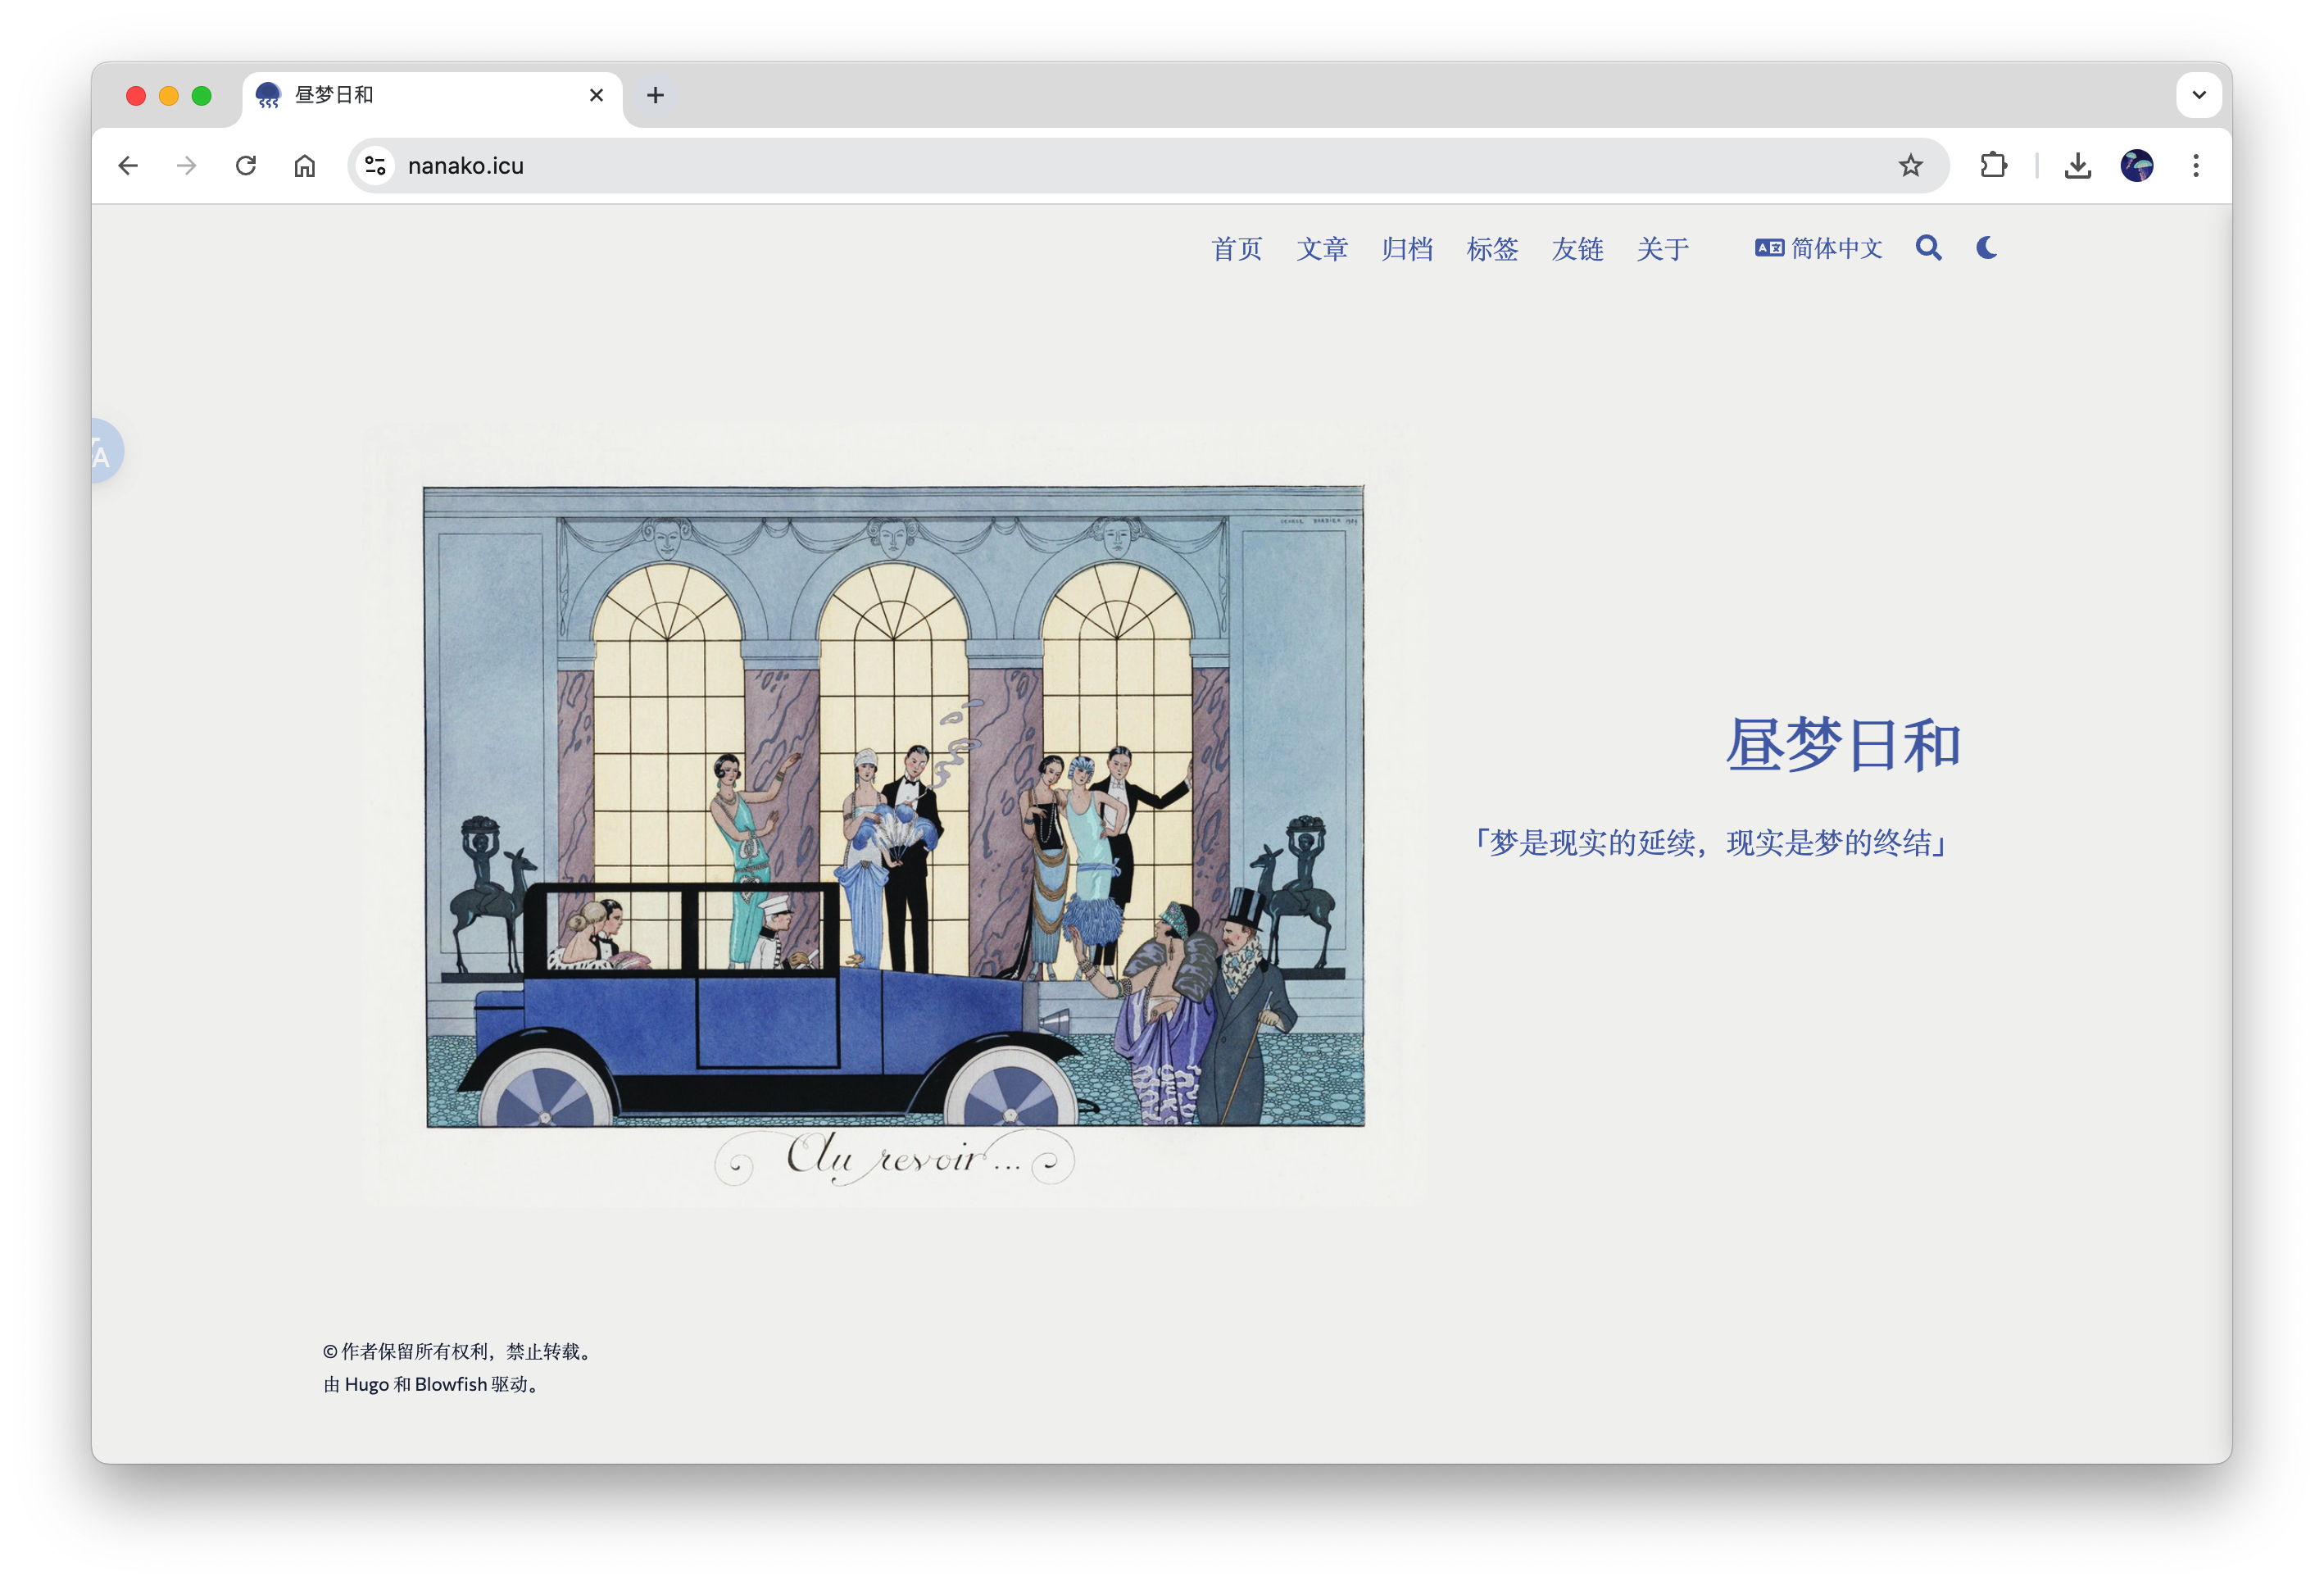
原本的首页是用Blowfish提供的自定义主页选项(见下图),这个自定义选项给的自由度并不是特别高,只允许在顶部菜单栏至底部版权之间的空间中自定义。

我原本的首页是在左侧放了张图片,右侧放标题,如图:
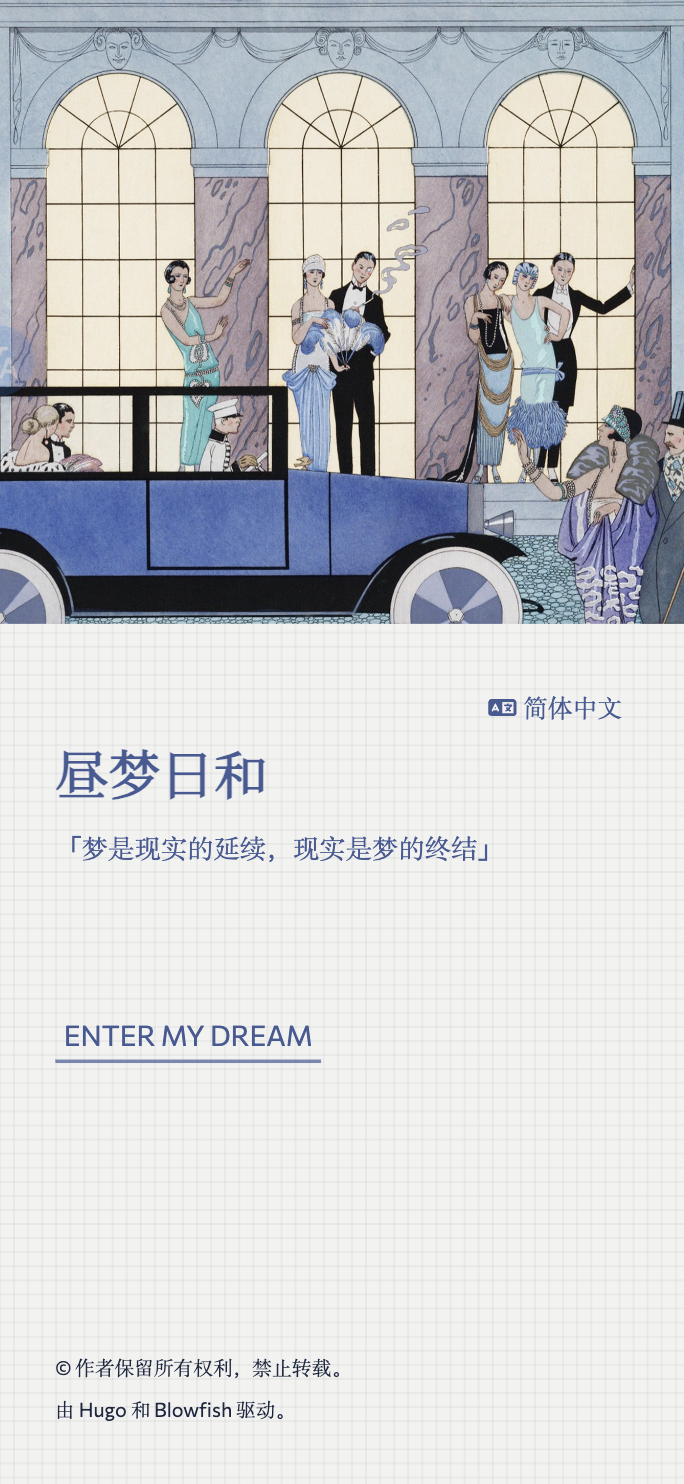
但是看久了就有点看腻了……虽然我喜新厌旧,但是我也挺懒的,不想大改,想了想就在原首页的基础上放大了图片,增大冲击力;同时菜单栏只保留了语言切换按钮,右侧的文字部分放标题、描述和版权信息,最终效果如图:

这里附有HTML代码:
展开HTML代码/收起
<!DOCTYPE html>
<html lang="zh-CN">
<head>
<meta charset="UTF-8" />
<title>{{ .Title }}</title>
<meta name="viewport" content="width=device-width, initial-scale=1.0" />
<link rel="stylesheet" href="/css/typography.css" />
</head>
<body>
{{ partial "head.html" . }}
<!-- 顶部语言选择浮动按钮 -->
<div class="language-toggle">
<div>
{{ partial "translations.html" . }}
</div>
</div>
<!-- 主内容容器 -->
<div class="homepage-container">
<!-- 图片区块 -->
<div class="image-section">
<img src="/cover-no-frame.jpg" alt="网站首页的封面背景图" class="background-image" />
</div>
<!-- 文字区块 -->
<div class="text-section">
<div class="text-content">
{{ with .Params.title }}
<h1 class="homepage-title">
{{ . }}
</h1>
{{ end }}
{{ with .Params.subtitle }}
<h2 class="homepage-subtitle">{{ . }}</h2>
{{ end }}
{{ with .Params.description }}
<p class="homepage-description">
{{ . | markdownify }}
</p>
{{ end }}
{{ if .Params.show_action_link }}
<p class="homepage-action-link">
<a class="mt4 action link-hover-effect {{ .Params.action_type }}" href="{{ .Params.action_link | relURL }}">
{{ .Params.action_label | safeHTML }}
</a>
</p>
{{ end }}
</div>
<!-- 版权信息区块 -->
<div class="footer-info">
{{ if .Site.Params.footer.showCopyright | default true }}
<p class="footer-text">
{{ with replace .Site.Params.copyright "{ year }" now.Year }}
{{ . | markdownify }}
{{ else }}
© {{ now.Format "2006" }} {{ .Site.Params.Author.name | markdownify }}
{{ end }}
</p>
{{ end }}
{{ if .Site.Params.footer.showThemeAttribution | default true }}
<p class="footer-text footer-attribution">
{{ $hugo := printf `<a class="hover:underline hover:decoration-primary-400 hover:text-primary-500"
href="https://gohugo.io/" target="_blank" rel="noopener noreferrer">Hugo</a>` }}
{{ $blowfish := printf `<a class="hover:underline hover:decoration-primary-400 hover:text-primary-500"
href="https://blowfish.page/" target="_blank" rel="noopener noreferrer">Blowfish</a>` }}
{{ i18n "footer.powered_by" (dict "Hugo" $hugo "Theme" $blowfish) | safeHTML }}
</p>
{{ end }}
</div>
</div>
</div>
</body>
</html>这里附有CSS代码:
展开CSS代码/收起
body {
  margin: 0;
  padding: 0;
  background-color: rgb(242, 242, 241);
  background-image:
    linear-gradient(0deg, rgba(0, 0, 0, 0.04) 1px, transparent 1px),
    linear-gradient(90deg, rgba(0, 0, 0, 0.04) 1px, transparent 1px);
  background-size: 8px 8px;
}

.dark body {
background-color: rgba(68,91,149);
background-image:
linear-gradient(0deg, rgba(255, 255, 255, 0.03) 1px, transparent 1px),
linear-gradient(90deg, rgba(255, 255, 255, 0.03) 1px, transparent 1px);
background-size: 8px 8px;
}

html, body {
margin: 0;
padding: 0;
height: 100%;
}

/* 顶部右上角语言切换 */
.language-toggle {
position: absolute;
top: 1rem;
right: 1rem;
width: 100px;
z-index: 50;
color: #445B95;
display: flex;
align-items: center;
justify-content: space-between;
}

/* 整个页面布局容器 */
.homepage-container {
display: flex;
height: 100vh;
width: 100vw;
}

/* 左侧图片区域 */
.image-section {
width: 100%;
height: 100%;
}

.background-image {
width: 100%;
height: 100%;
object-fit: cover;
}

/* 右侧文字区域 */
.text-section {
width: 66.66%;
padding: 4rem;
display: flex;
flex-direction: column;
justify-content: space-between;
}

/* 文本内容区域 */
.text-content {
margin-top: 16rem;
}

/* 标题与文本样式 */
.homepage-title {
color: rgba(68,91,149);
font-size: 2rem;
line-height: 1.25;
font-weight: 600;
margin-bottom: 1rem;
max-width: 28rem;
margin-left: auto;
margin-right: auto;
}

.dark .homepage-title {
color: rgb(242, 242, 241);
font-size: 2rem;
line-height: 1.25;
font-weight: 600;
margin-bottom: 1rem;
max-width: 28rem;
margin-left: auto;
margin-right: auto;
}

@media (min-width: 1024px) {
.homepage-title {
font-size: 2.5rem; /* Tailwind: lg:text-5xl */
margin-left: 0;
margin-right: 0;
}
}

.homepage-subtitle {
font-size: 1rem;
color: #445B95;
margin-bottom: 1rem;
}

.homepage-description {
font-size: 1.125rem; /* Tailwind: text-lg */
color: #445B95; /* Tailwind: text-gray-700 */
line-height: 1.75;
max-width: 28rem;
margin: 1.5rem auto 2rem auto;
white-space: nowrap;
}

@media (min-width: 1024px) {
.homepage-description {
margin-left: 0;
margin-right: 0;
}
}

.homepage-action-link {
margin-top: 5rem;
}

/* 进入按钮的样式 */
.link-hover-effect {
color: rgba(68,91,149);
text-decoration: none;
transition: all 0.1s ease-in-out;
padding: 0.1rem 0.3rem;
border-bottom: 2px solid rgba(68,91,149, 0.7);
margin-top: 24px;
}

.dark .link-hover-effect {
color: rgb(242, 242, 241);
text-decoration: none;
transition: all 0.1s ease-in-out;
padding: 0.1rem 0.3rem;
border-bottom: 2px solid rgba(242, 242, 241, 0.7);
margin-top: 24px;
}

/* 鼠标移动到进入按钮上显示的样式 */
.link-hover-effect:hover {
background-color: rgba(46, 64, 91, 0.94);
color: rgb(243, 244, 246);
}

.dark .link-hover-effect:hover {
background-color: rgb(243, 244, 246);
color: rgba(46, 64, 91, 0.94);
}


/* 底部版权等信息 */
.footer-info {
display: flex;
flex-direction: column;
}

.footer-text {
font-size: 0.875rem;
color: rgb(29,40,65); /* Tailwind: text-neutral-500 */
}

.footer-attribution {
font-size: 0.75rem;
}

/* 仅移动端覆盖,不影响桌面布局 */
@media (max-width: 768px){

  /* 容器:单列、合理留白 */
  .homepage-container{
    display: grid;                 /* 若原本不是 grid 也无妨 */
    grid-template-columns: 1fr;    /* 强制单列 */
    gap: 16px;
    min-height: 100dvh;
  }

  /* 大图:占满宽度、限制最高,避免只露窄条 */
  .image-section{
    overflow: hidden;
    max-height: 42vh;              /* 你可调成 36~50vh */
    /* 如需“文字先出现”,可加:order: 1;(或把 .text-section 设为 order: -1)*/
  }
  .image-section img{
    width: 100%;
    height: 100%;
    object-fit: cover;             /* 铺满裁切,观感更好 */
    display: block;
  }

  /* 文案区:缩小字号,提升可读性 */
  .text-section{
    padding: 0 16px 16px;
  }
  .text-content{
    max-width: 640px;
    margin: 0 auto;
  }
  .homepage-title{
    font-size: 30px;
    line-height: 1.2;
    margin: 8px 0 10px 16px;
  }
  .homepage-subtitle{
    font-size: 17px;
    margin: 0 0 10px 16px;
  }
  .homepage-description{
    font-size: 15px;
    line-height: 1.75;
    margin: 0 0 16px 16px;
  }

  /* CTA:可换行、不溢出、触控友好 */
  .homepage-action-link a{
    display: inline-flex;
    align-items: center;
    justify-content: center;
    max-width: 100%;
    word-break: break-word;
    margin: 0 0 16px 16px;
  }

  /* 版权与语言按钮:不遮挡内容 */
  .footer-info{
    width: max-content;
    font-size: 13px;
    line-height: 1.7;
    padding: 0 16px 16px;
    margin-top: 12px;
  }
  .language-toggle{
    right: 12px;
    bottom: 56px;
  }
  body{
    padding-bottom: 70px;          /* 预留空间,避免浮动按钮遮挡 */
  }
}我在HTML文件里引入了/css/typography.css,博客的代码文件可以直接访问static目录下的文件,也就是说,此css代码文件所应该在的位置是static/css/typography.css。由于我这个首页完全没有继承Blowfish的任何文件,所以它不会自动加载Blowfish中的scheme CSS文件,为了省事我就这么放了。
2025.09.03更新:
增加了对移动端的适配。
修改链接样式 #
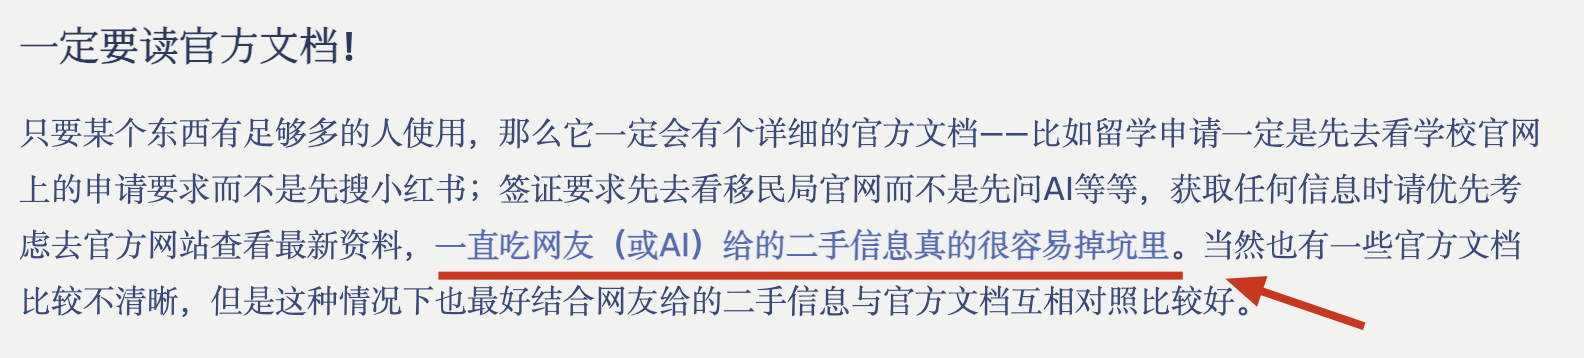
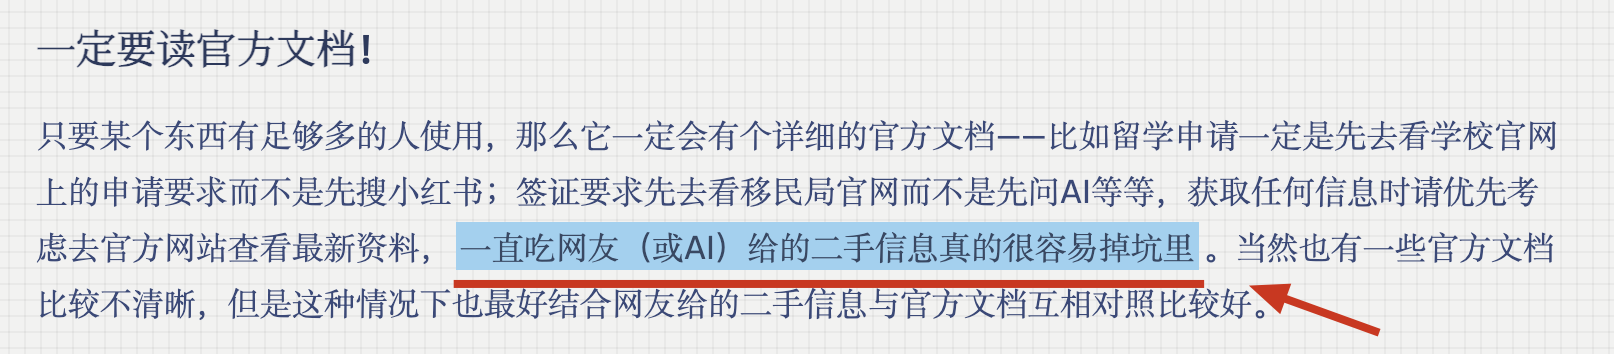
上一篇装修博客里已经把Blowfish原本的链接样式改了,效果是类似荧光笔的样子,如图:
其实也挺萌的!但我还是把它改成了现在的样子(见下图),就十分典雅美丽!!!
/* 给目录的链接加荧光笔效果 */
#TableOfContents a {
  color: rgba(68,91,149);
  transition: all 0.1s ease-in-out;
  padding: 0.1rem 0.3rem;
}
#TableOfContents a:hover {
  background-color: rgba(46, 64, 91, 0.94);
  color: rgb(243, 244, 246);
}

/*如果想在哪里加下划线,就加上这一行*/
/*border-bottom: 2px solid rgba(68,91,149, 0.7);*/
修改评论区 #
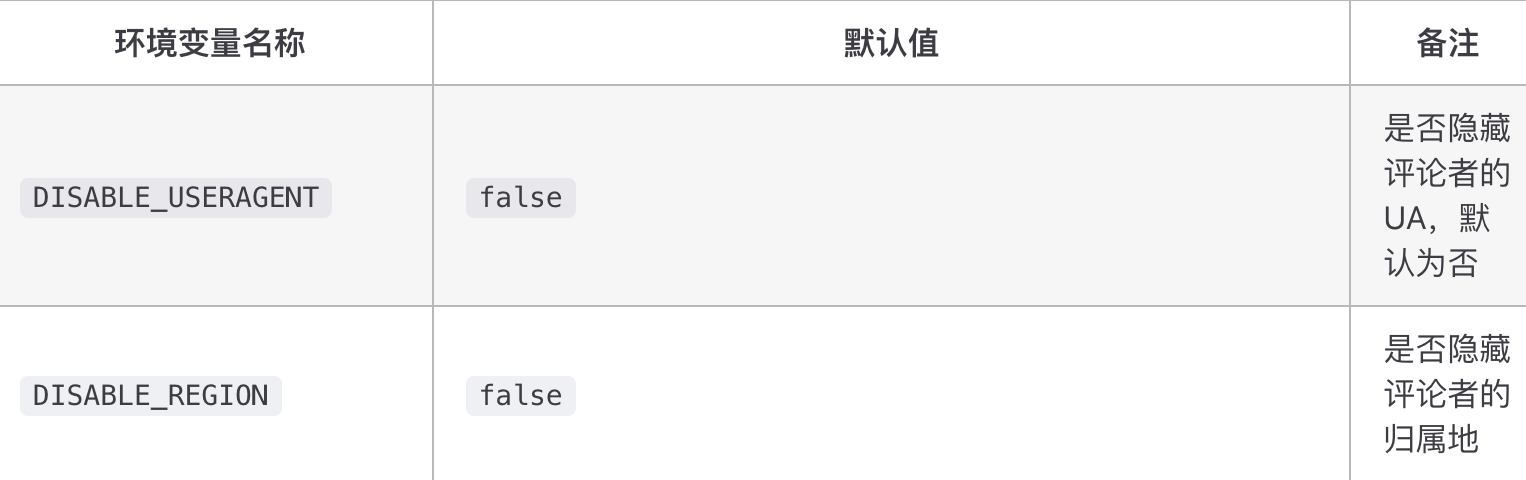
原本的评论区挺好的,有一点不好是任何人评论都会显示位置信息和设备信息……简直就是在互联网上裸奔……
翻了文档后找到了修改它的方式——在部署时添加两个环境变量去控制它的行为。
修改前:


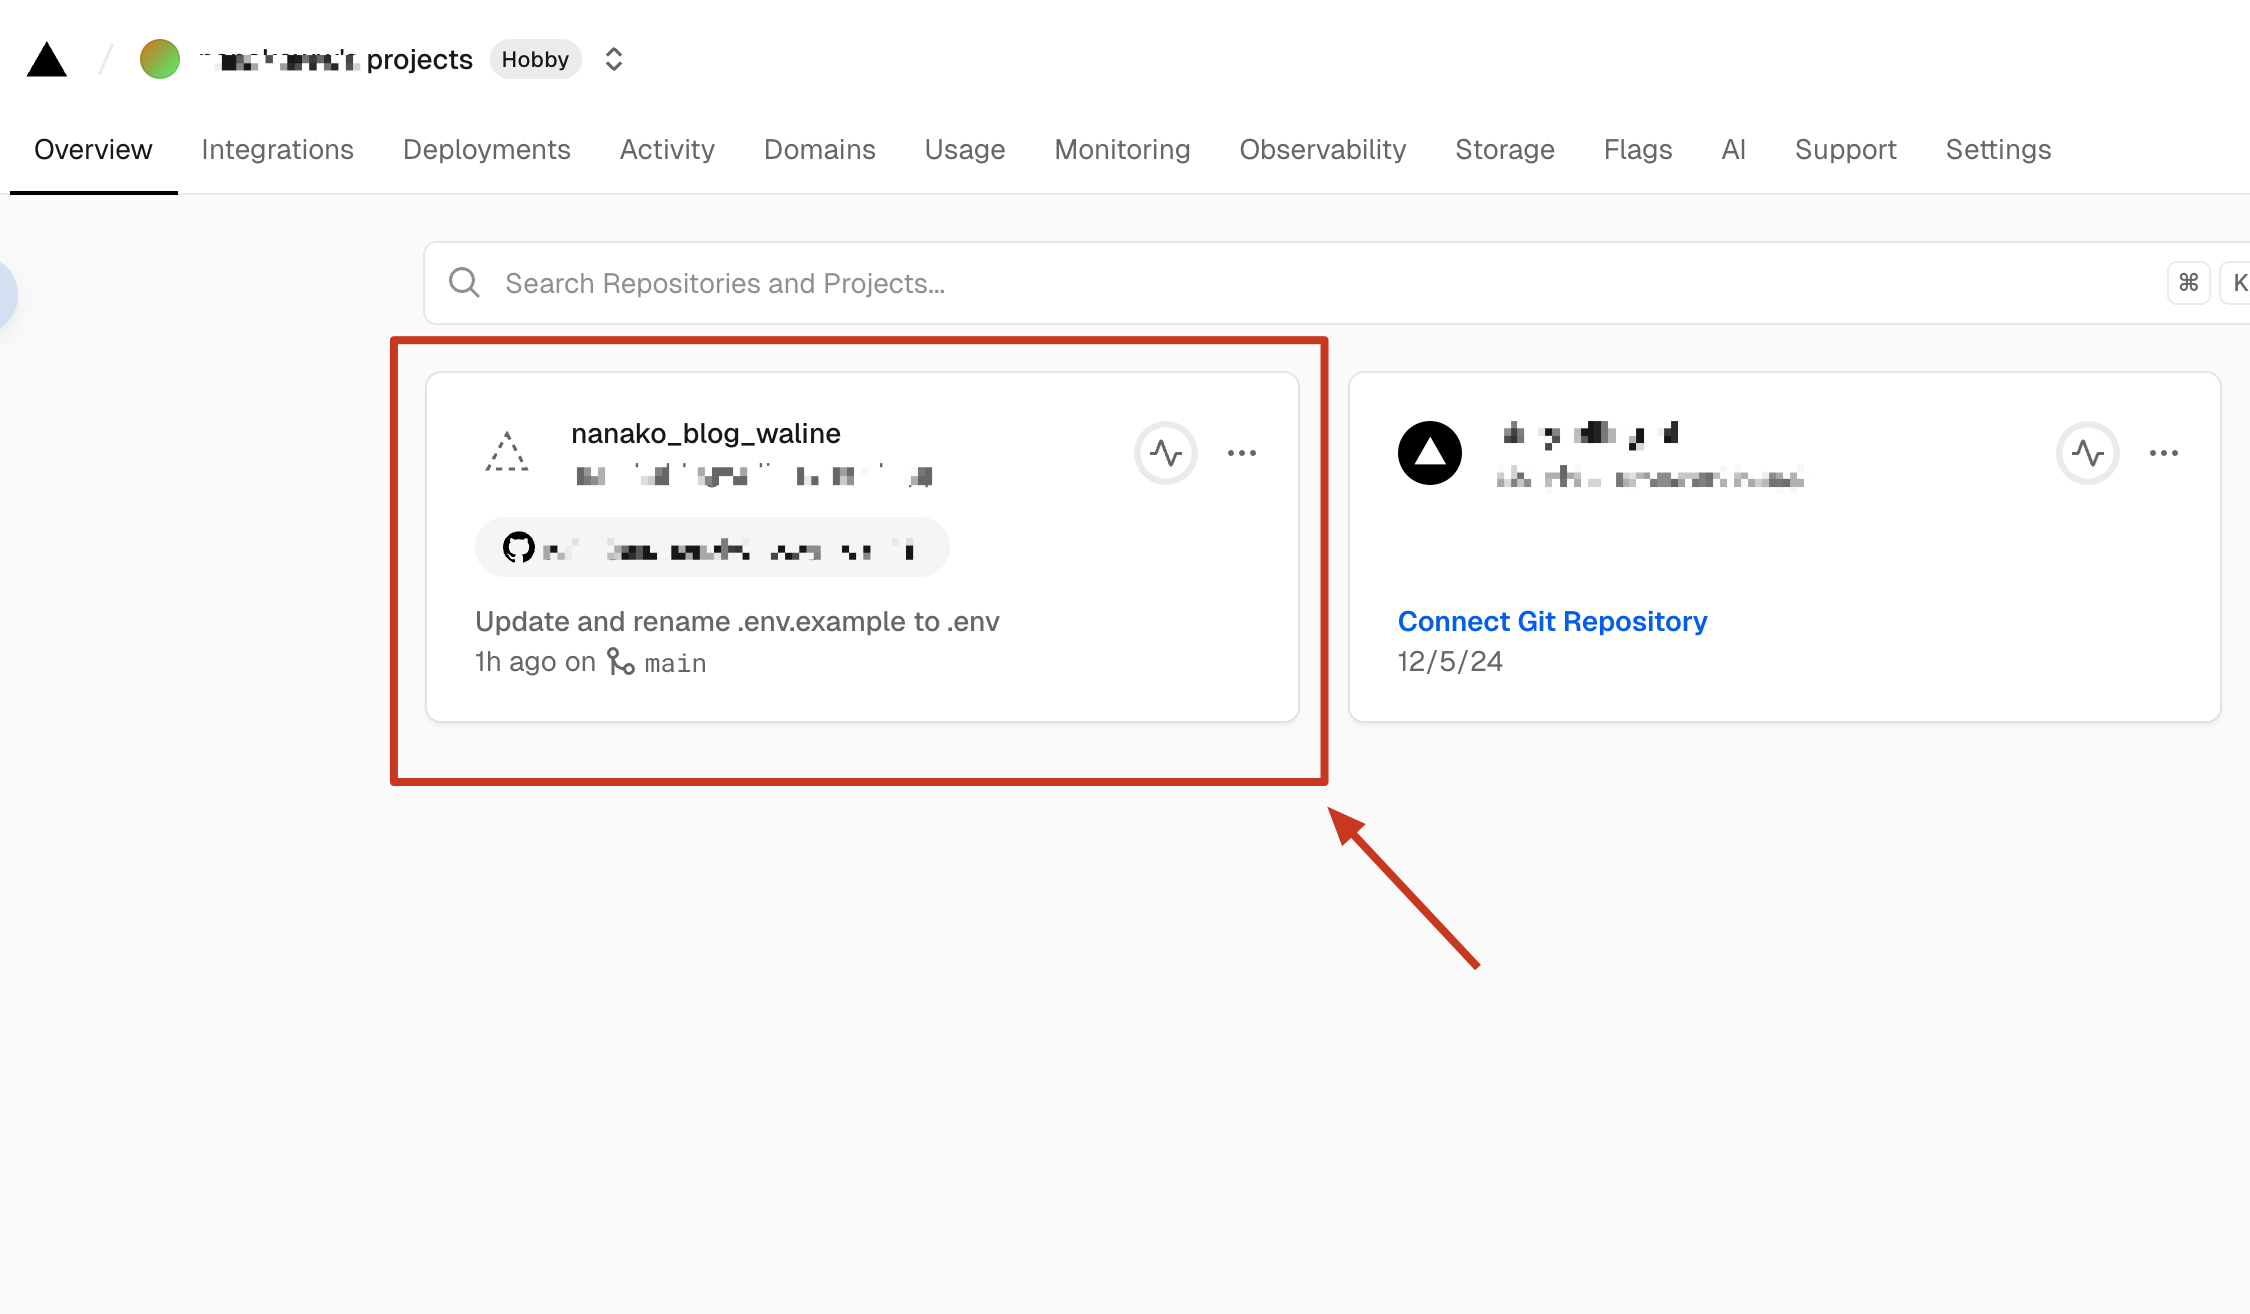
具体怎么添加环境变量呢?以Vercel部署为例,点击部署好的项目
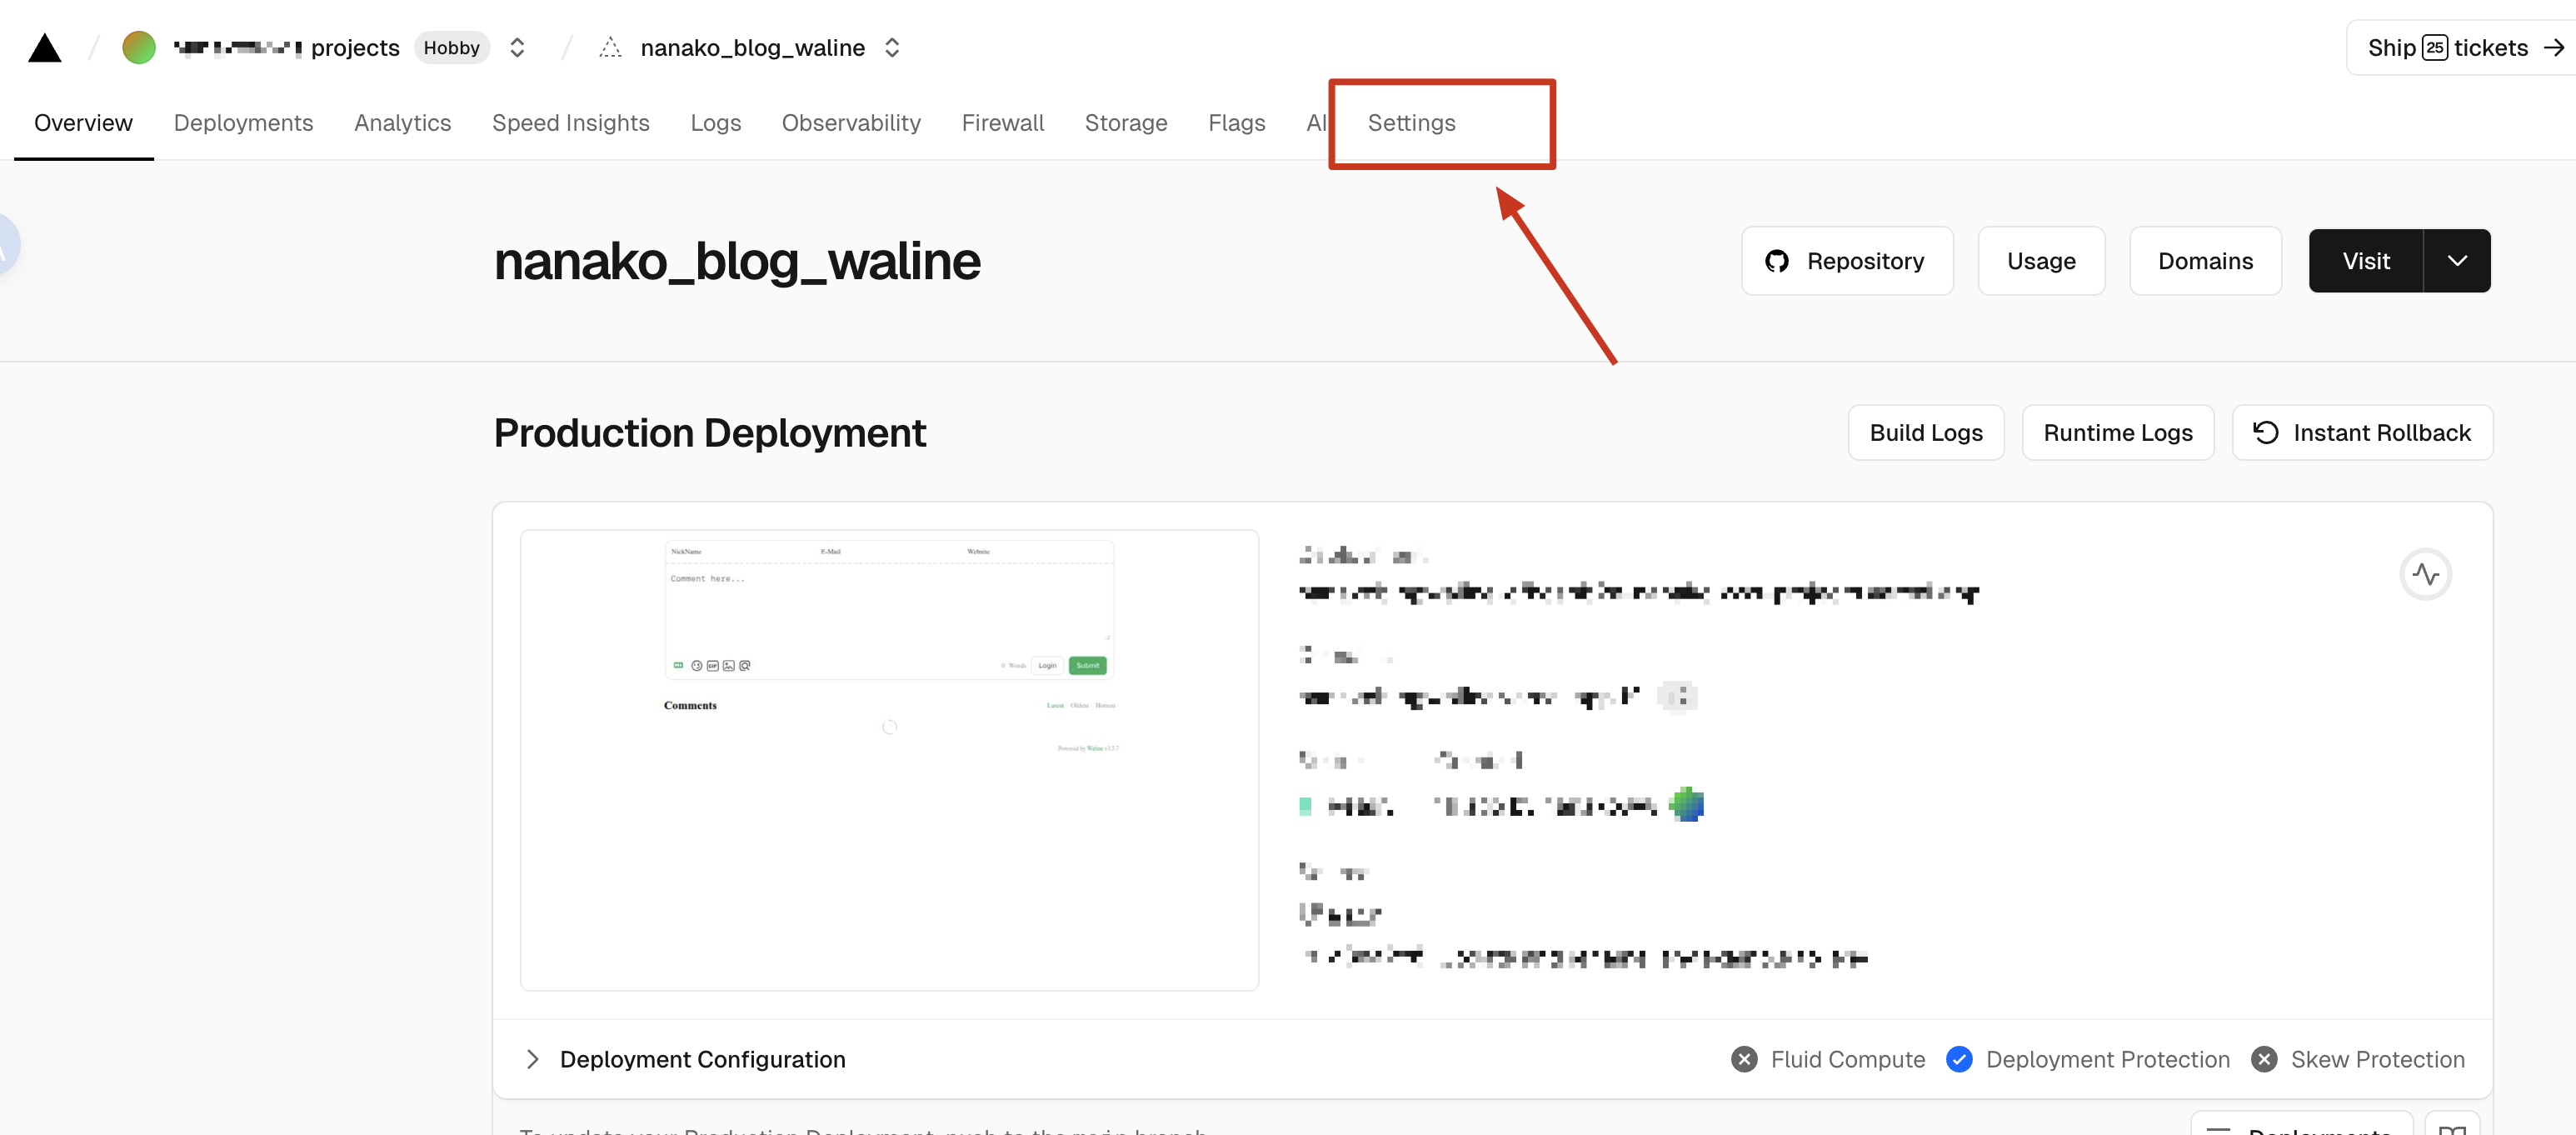
接着点击「Setting」
再点击「Environment Variables」
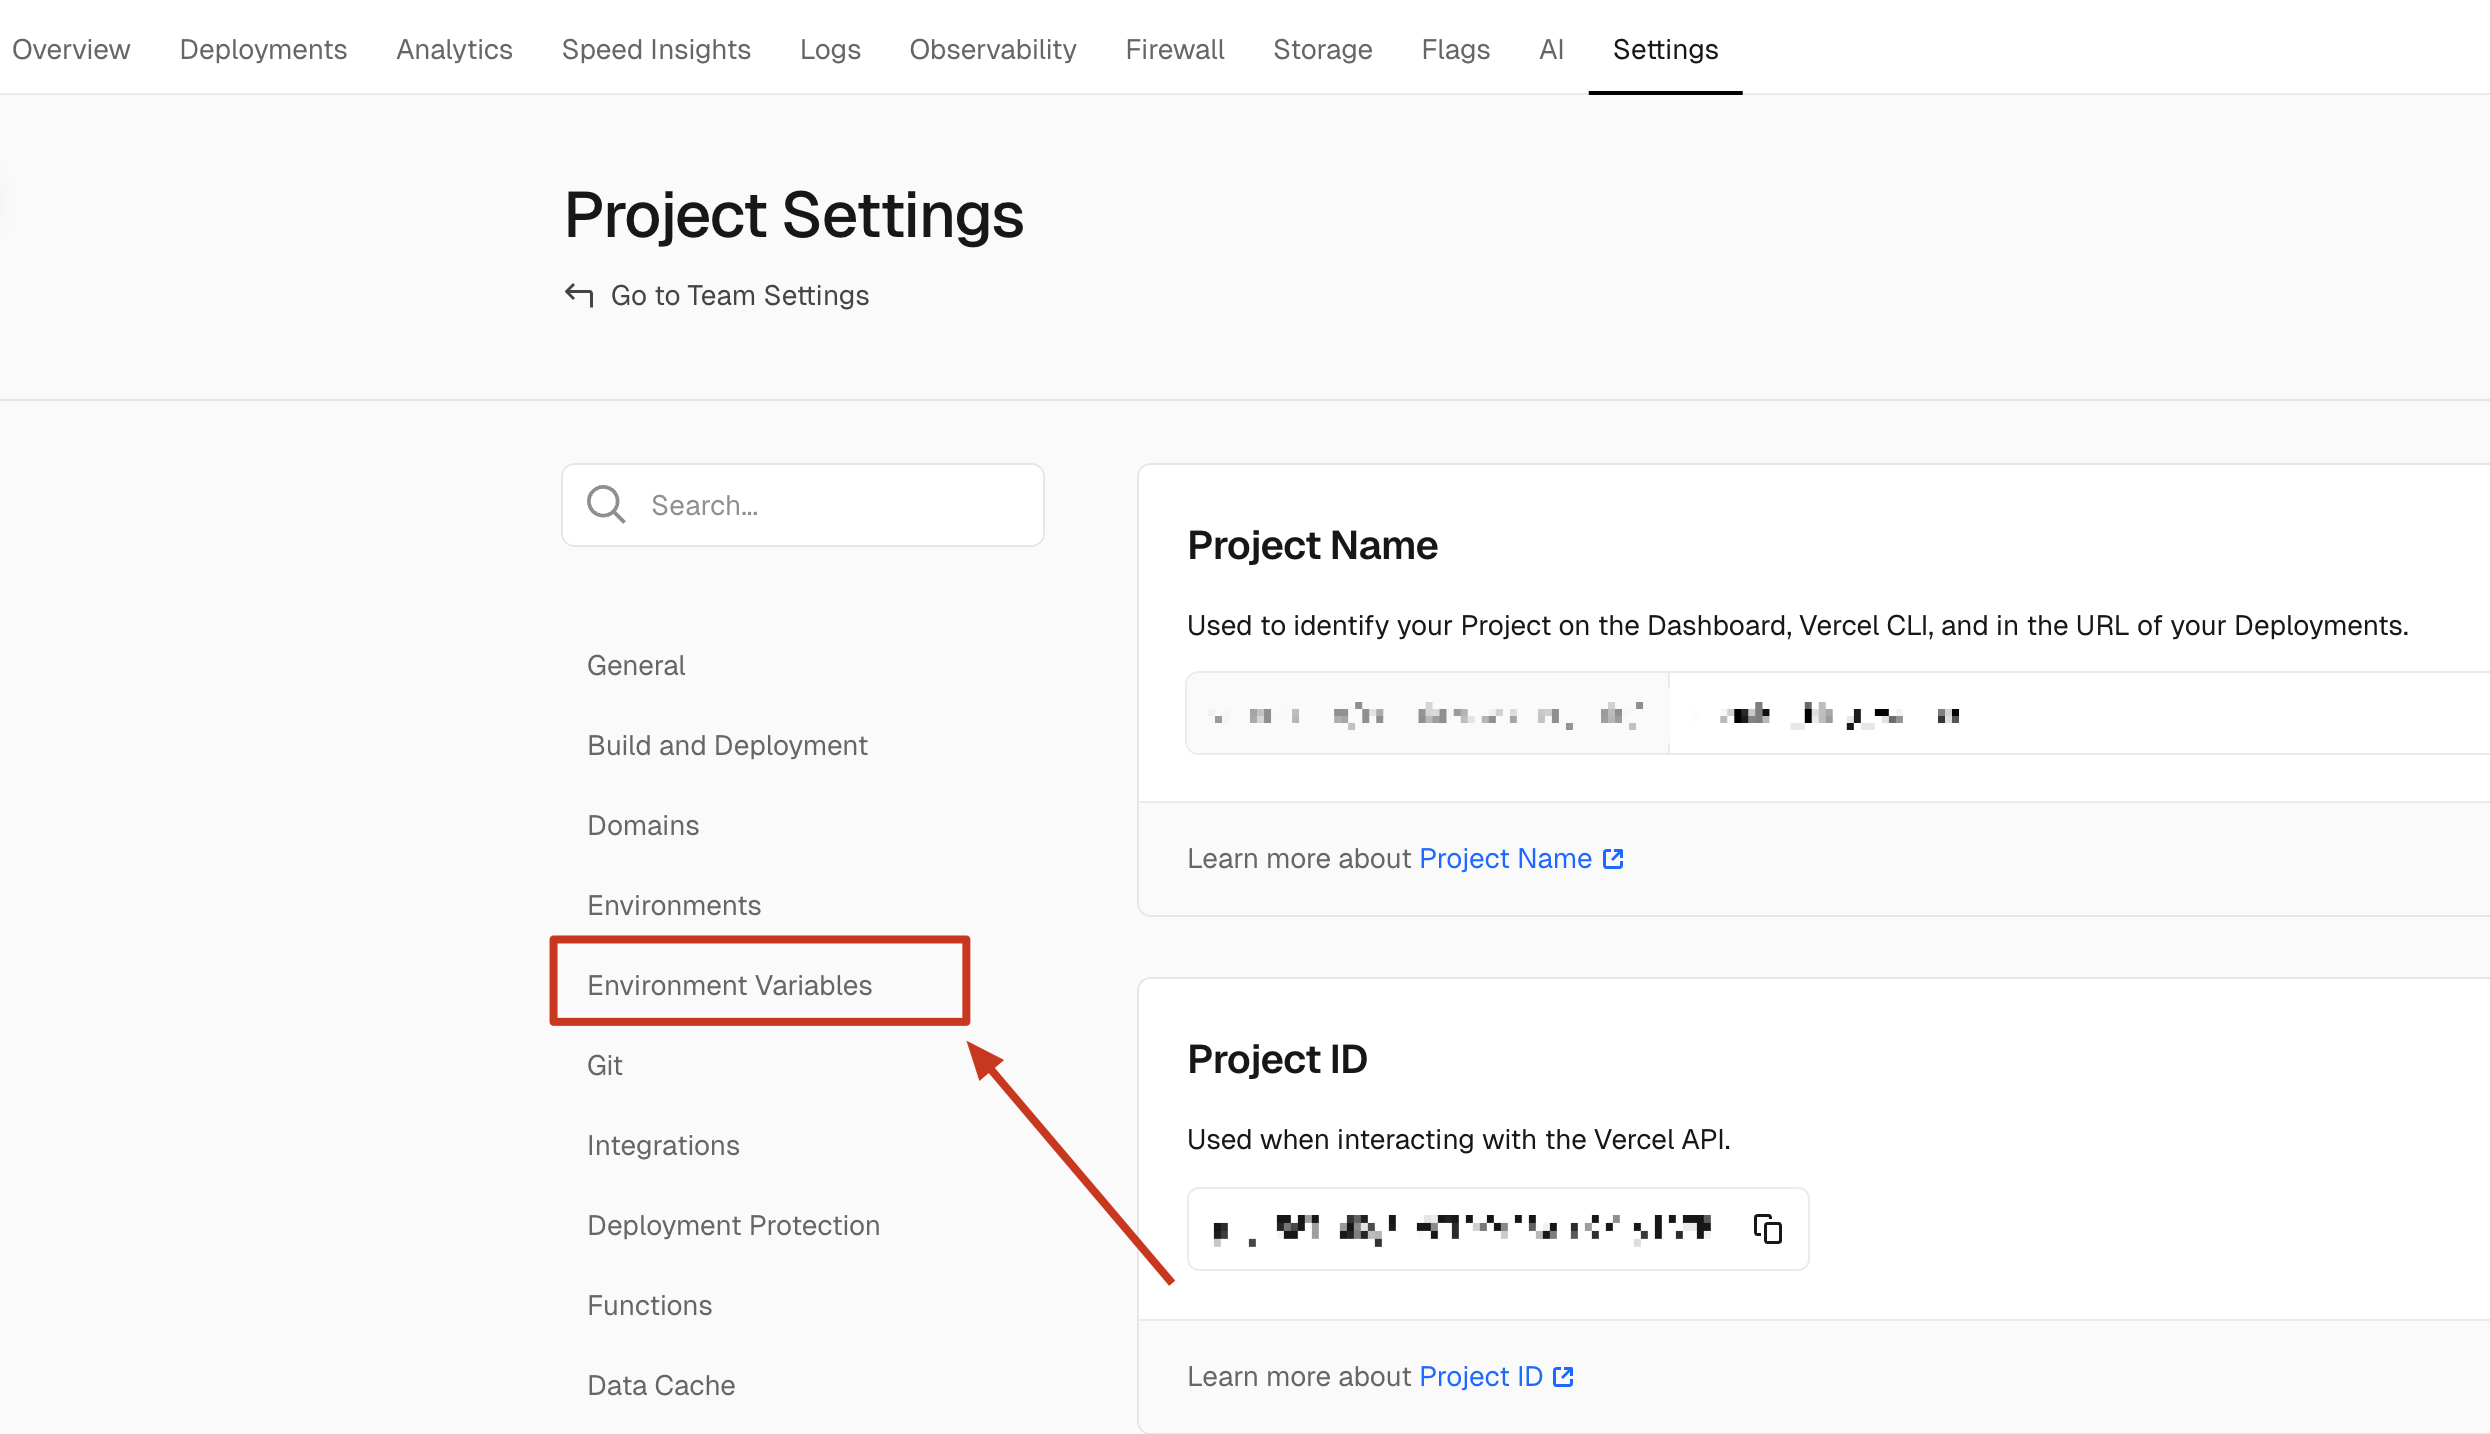
像这样添加自己想添加的环境变量,编辑完点击「Save」,然后系统会弹出个提示让你「Redeploy」,重新部署了以后这个设置就生效了!
修改加粗样式 #
受前言提到的博客的启发,我把加粗样式改成了类似于荧光笔的样式,超级美丽超级喜欢!代码如下:
b, strong {
  margin: 1px 2px;
  padding: 2px;
  color: rgba(46, 64, 91, 0.94);
  background-color: #96d2f0;
  font-weight: 400;
}

/* 暗黑模式 */
.dark b, .dark strong {
  margin: 1px 2px;
  padding: 2px;
  color: #96d2f0;
  background-color: rgba(46, 64, 91, 0.94);
  font-weight: 400;
}
修改前:
修改后:
自定义归档页(2025.11.10更新) #
Blowfish是没有默认的归档页的,所以我自己加了一个。具体参考了Hugo 归档页面制作这篇博客。其实它已经写得很详细了,但我还是在Blowfish主题的基础上说一下吧~
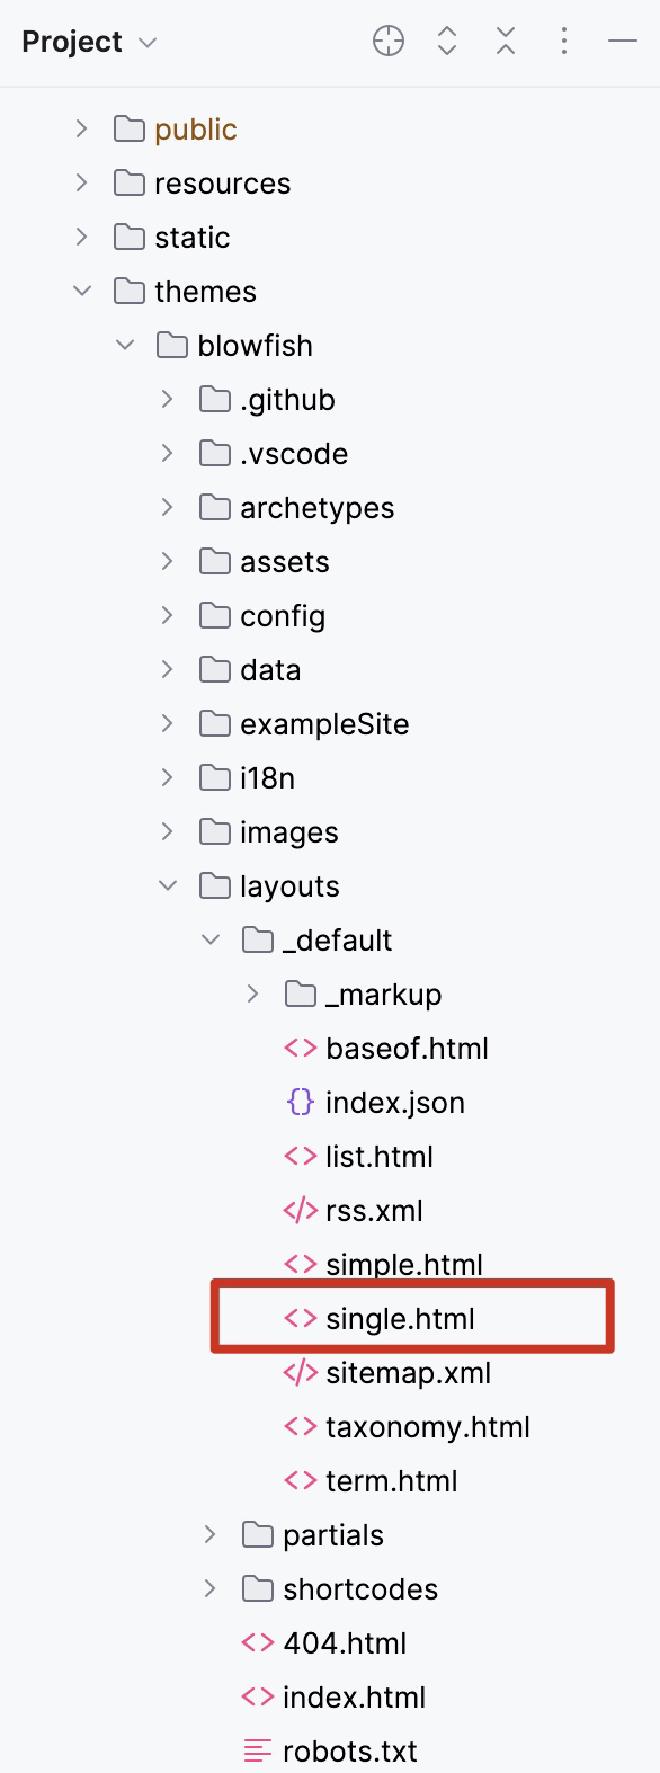
首先,Blowfish提供了好几种不同布局的页面,具体请看官方文档中的内容示例部分。在自定义某个页面时,自己心里可能也已经对想要什么布局心里有个概念,比如我想它继承Blowfish的样式,带有顶部和底部导航栏,那么符合我要求的就是「叶子页面」,从Blowfish主题代码目录下的layouts/_default/single.html可以找到它的代码(如图)。
然后将里面的代码复制出来,在自己的博客目录下同样的位置里创建一个archives.html文件,粘贴过去后,再将其中的{{ .Content }}替换为以下代码:
{{ range $year := (.Site.RegularPages.GroupByDate "2006") }}
{{ if ne $year.Key "0001" }}
<h3>{{ $year.Key }}</h3>
<ul class="archive-list">
{{ range (where $year.Pages "Type" "posts") }}
<li>
{{ .PublishDate.Format "2006-01-02" }}
<a href="{{ .RelPermalink }}">{{ .Title }}</a>
</li>
{{ end }}
</ul>
{{ end }}
{{ end }}接着创建archives.md文件,放以下内容:
---
title: "归档"
layout: "archives"
showDate: false
showLikes: false
showPagination: false
---最后在顶部导航栏加入归档页的按钮,在config/_default/menus.[language].toml文件中加入以下内容:
[[main]]
name = "归档"
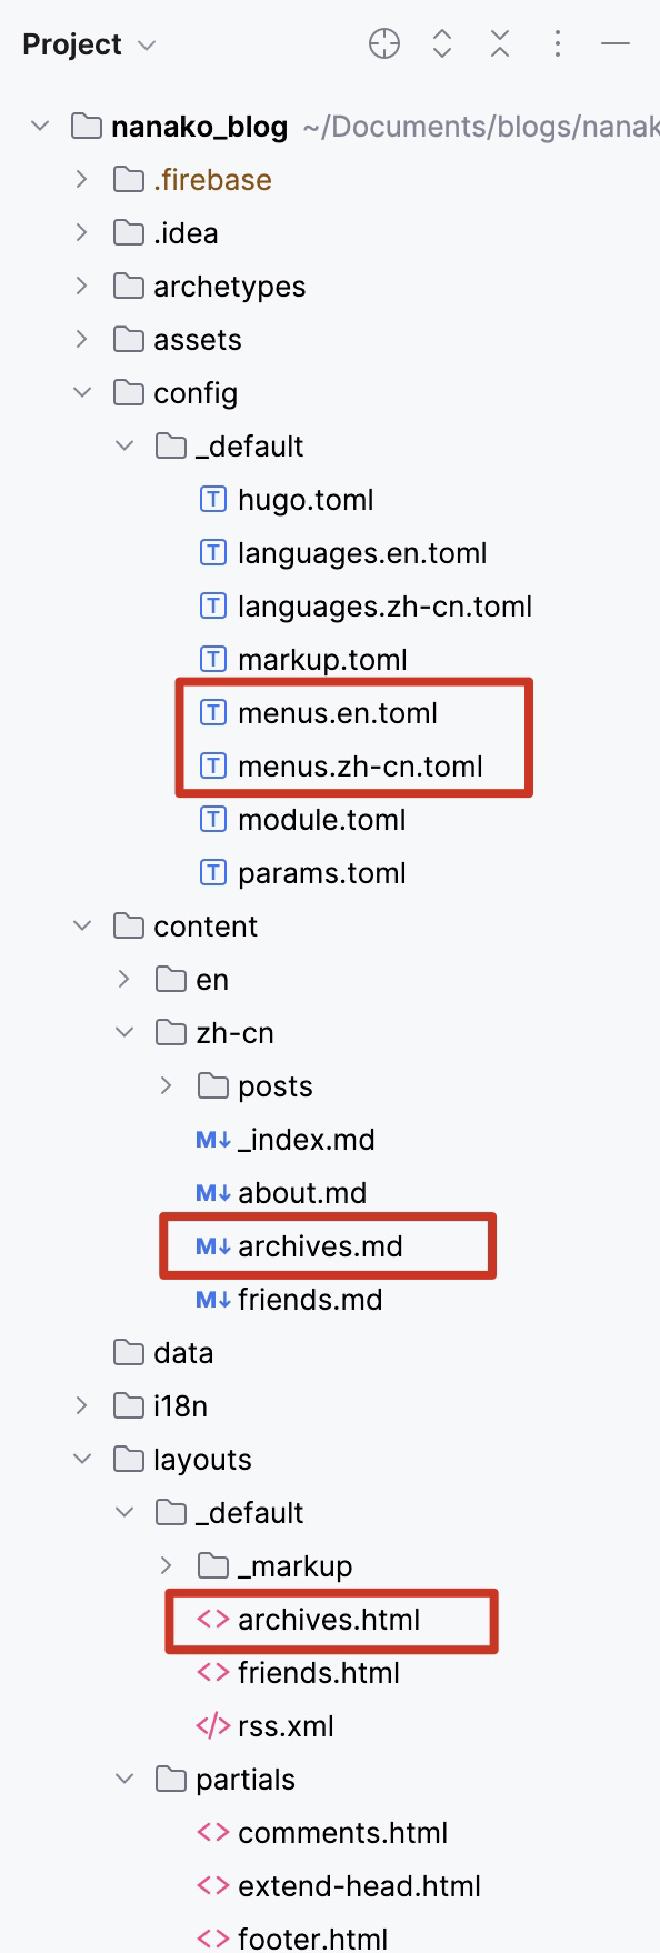
pageRef = "archives"这样归档页面就做好啦!最后呈现出来的目录结构就是这样:
其他零碎设置 #
目录的跟随滚动高亮功能 #
这个功能就是让读者在滚动文章时,目录能自动跟踪读者目前所在的部分并把它高亮标注出来
如果也使用了Blowfish主题的话,在config/_default/params.toml里添加smartTOC=true就可以了。如果没有用Blowfish主题想要自己添加的话,找找自己主题里的toc.toml,在里面添加如下代码应该就可以了(没试验过)
(function () {
  var $toc = $('#TableOfContents');
  if ($toc.length > 0) {
    var $window = $(window);

    function onScroll() {
      var currentScroll = $window.scrollTop();
      var h = $('.anchor');
      var id = "";
      h.each(function (i, e) {
        e = $(e);
        if (e.offset().top - $(window).height()/3 <= currentScroll) {
          id = decodeURIComponent(e.attr('id'));
        }
      });
      var active = $toc.find('a.active');
      if (active.length == 1 && active.eq(0).attr('href') == '#' + id) return true;

      active.each(function (i, e) {
        {{ if .Site.Params.smartTOCHideUnfocusedChildren }}
          $(e).removeClass('active').siblings('ul').hide();
        {{ else }}
          $(e).removeClass('active');
        {{ end }}
      });
      $toc.find('a[href="#' + id + '"]').addClass('active')
      $toc.find('a[href="#' + id + '"]').parentsUntil('#TableOfContents').each(function (i, e) {
        $(e).children('a').parents('ul').show();
      });
    }

    $window.on('scroll', onScroll);
    $(document).ready(function () {
      {{ if .Site.Params.smartTOCHideUnfocusedChildren }}
        $toc.find('a').parent('li').find('ul').hide();
      {{ end }}
      onScroll();
    });
  }
})();
选中菜单的高亮功能 #
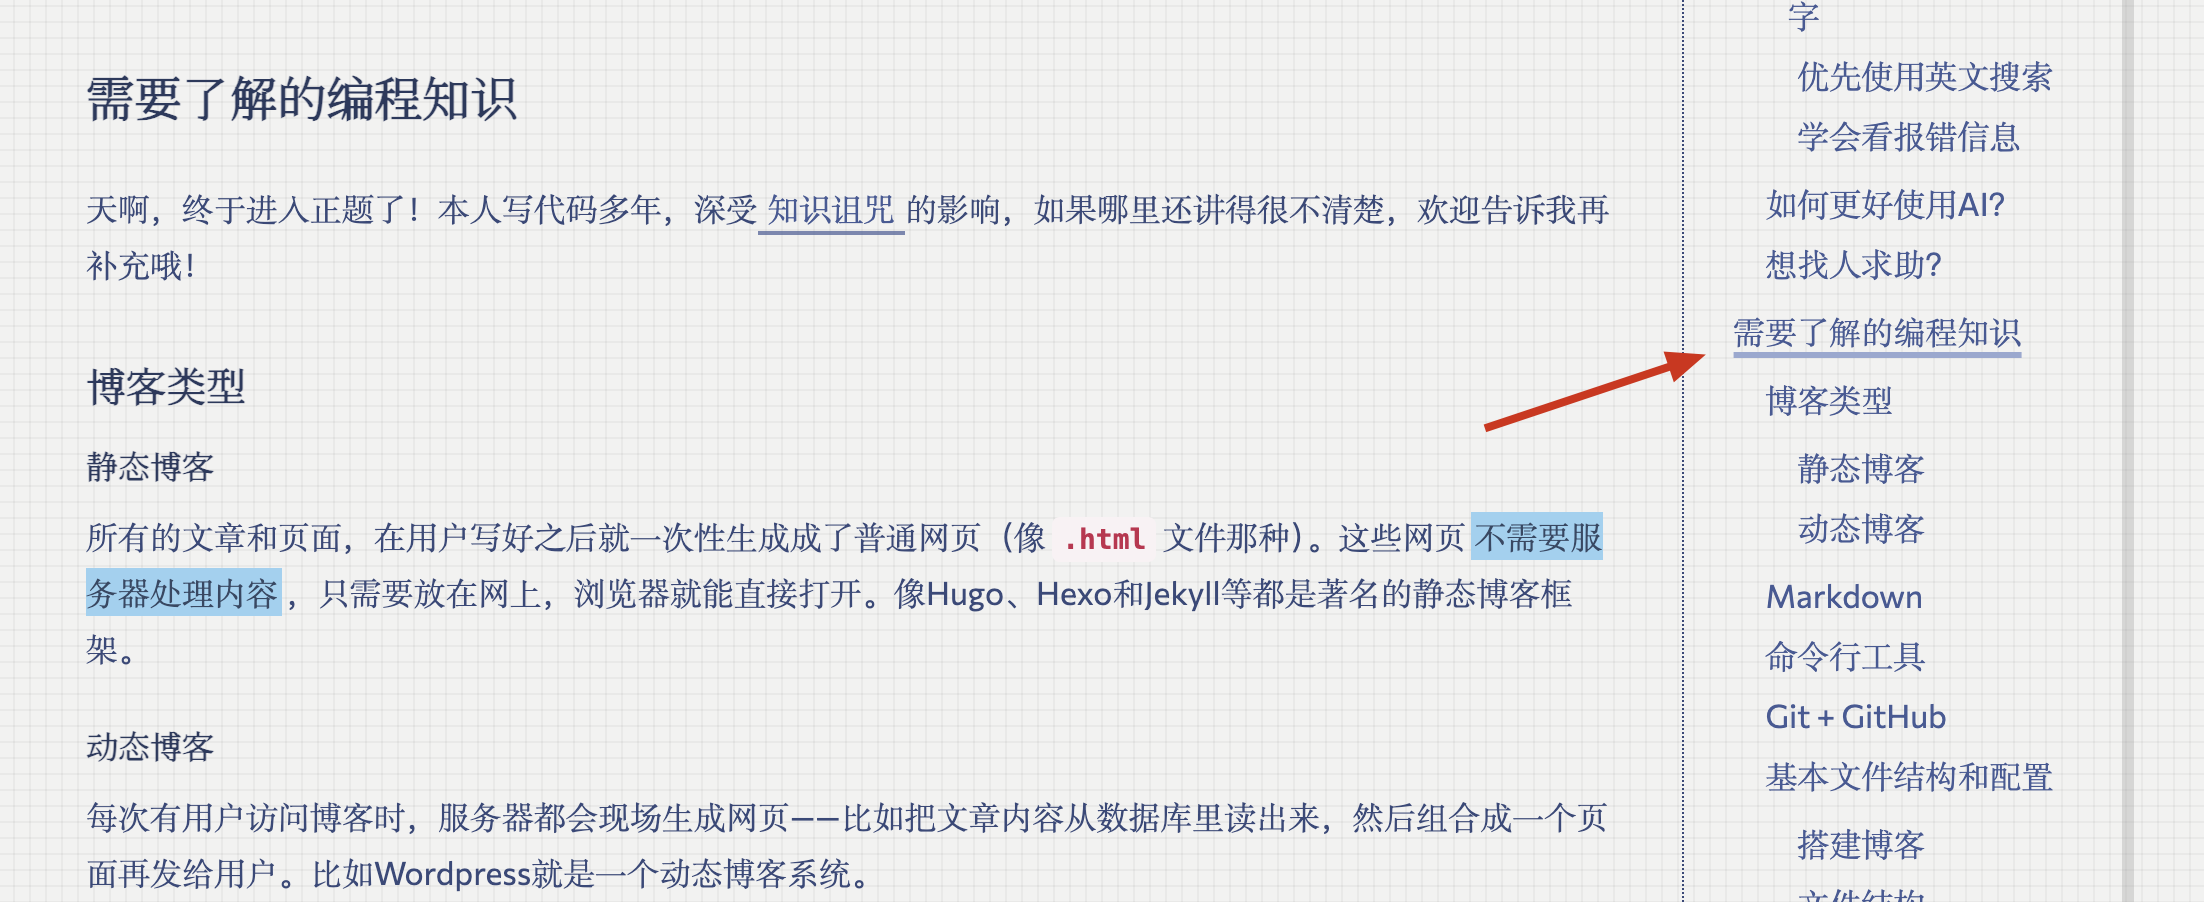
意思就是当我选中某个菜单项时,会有选中效果提示我现在在什么页面,如图:
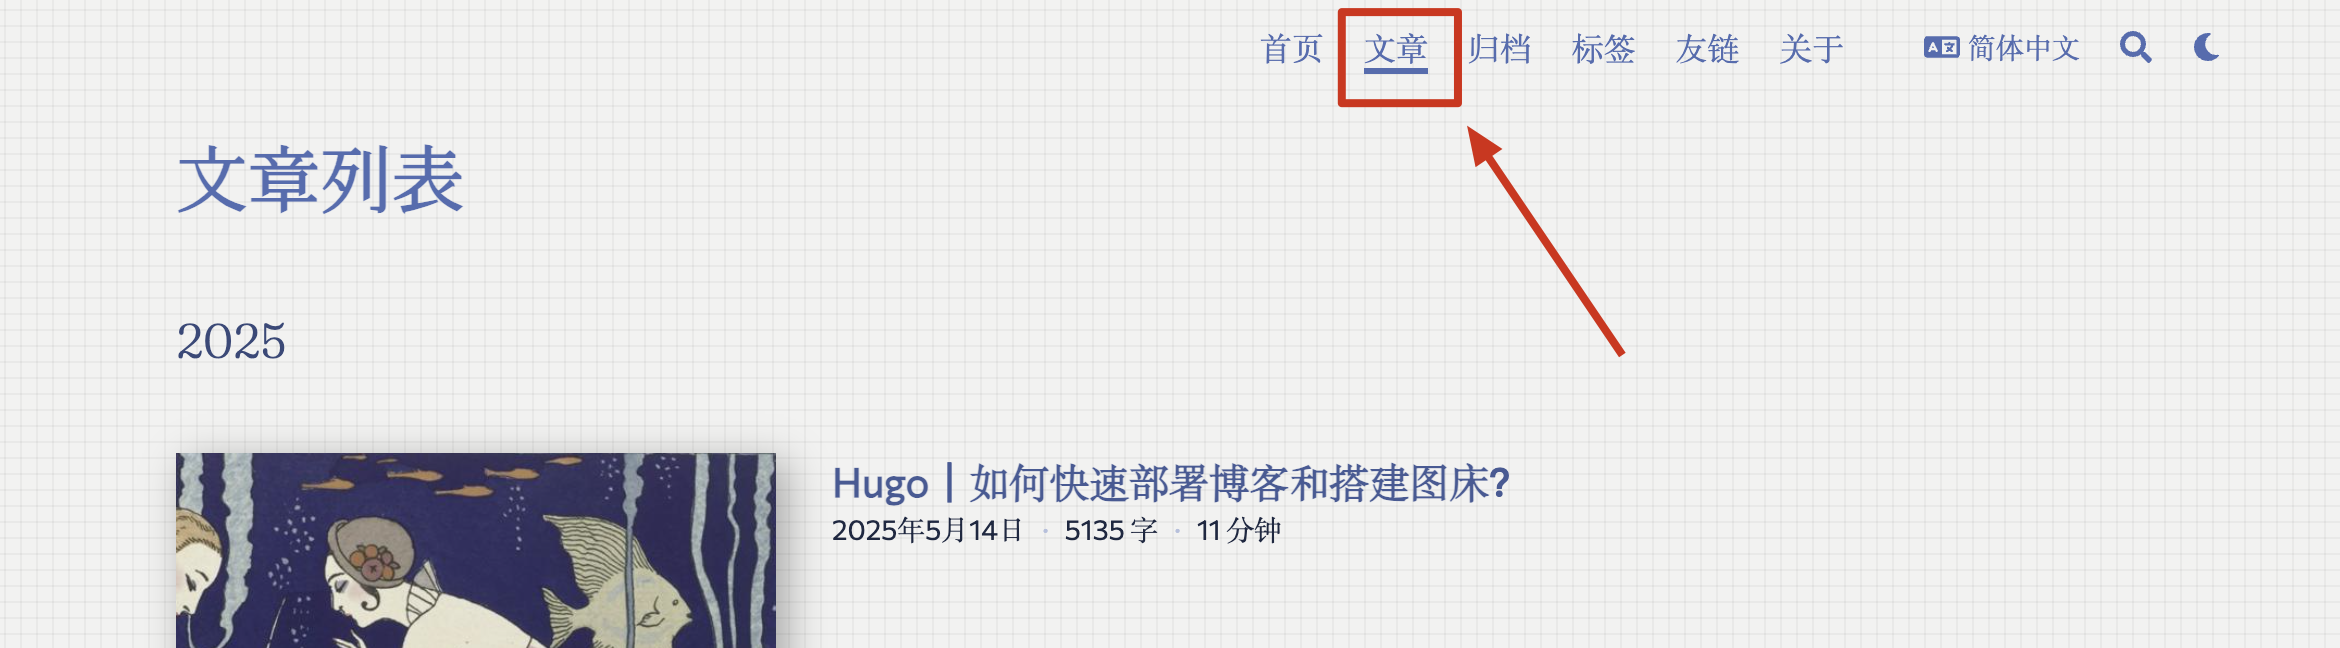
config/_default/params.toml里添加highlightCurrentMenuArea=true。
总结 #
其实个人觉得装修博客是一件很有正反馈的事情——自己做出的任何改变都可以立刻看到变化,并且可以想装啥样就装啥样~友链里有很多装修天才,每次看到那么有个人风格的博客都觉得两眼一亮,心里大叫“好想要啊啊啊啊”遂而半打鸡血地开装、、不过私以为虽然是到处抄作业,但是最后抄出来的东西也是有咱自己风格和想法的(雾